Once you have requested a check from your employee, and they have submitted their document evidence, you will be required to verify the evidence to confirm the employees evidence to verify their status on the check.
Who Verifies Documents?
Any user within CheckWorkRights can be a verifier, no matter which level of access they have. The verifiers role is to sight the submitted documents and check that the details match the employee.
Our recommendation is to assign verification to users who have direct access to the employee, or can verify employee details in person. That may be a hiring manager, HR leader, or store manager.
Process for Reviewing & Verifying Documents
When new documents are uploaded to employee records, their assigned Verifier will be automatically notified. You can also view the documents by selecting the Awaiting Verification From You tile under Action Required on the Dashboard.
Desktop: Document Verification Dashboard
Access the Document Verification Dashboard by clicking the Verification tab on the left of the app.
Here you can filter Employees awaiting document verification by check types, Verifiers, and submission dates. Toggle to 'Assigned to Me' to see only your own tasks.
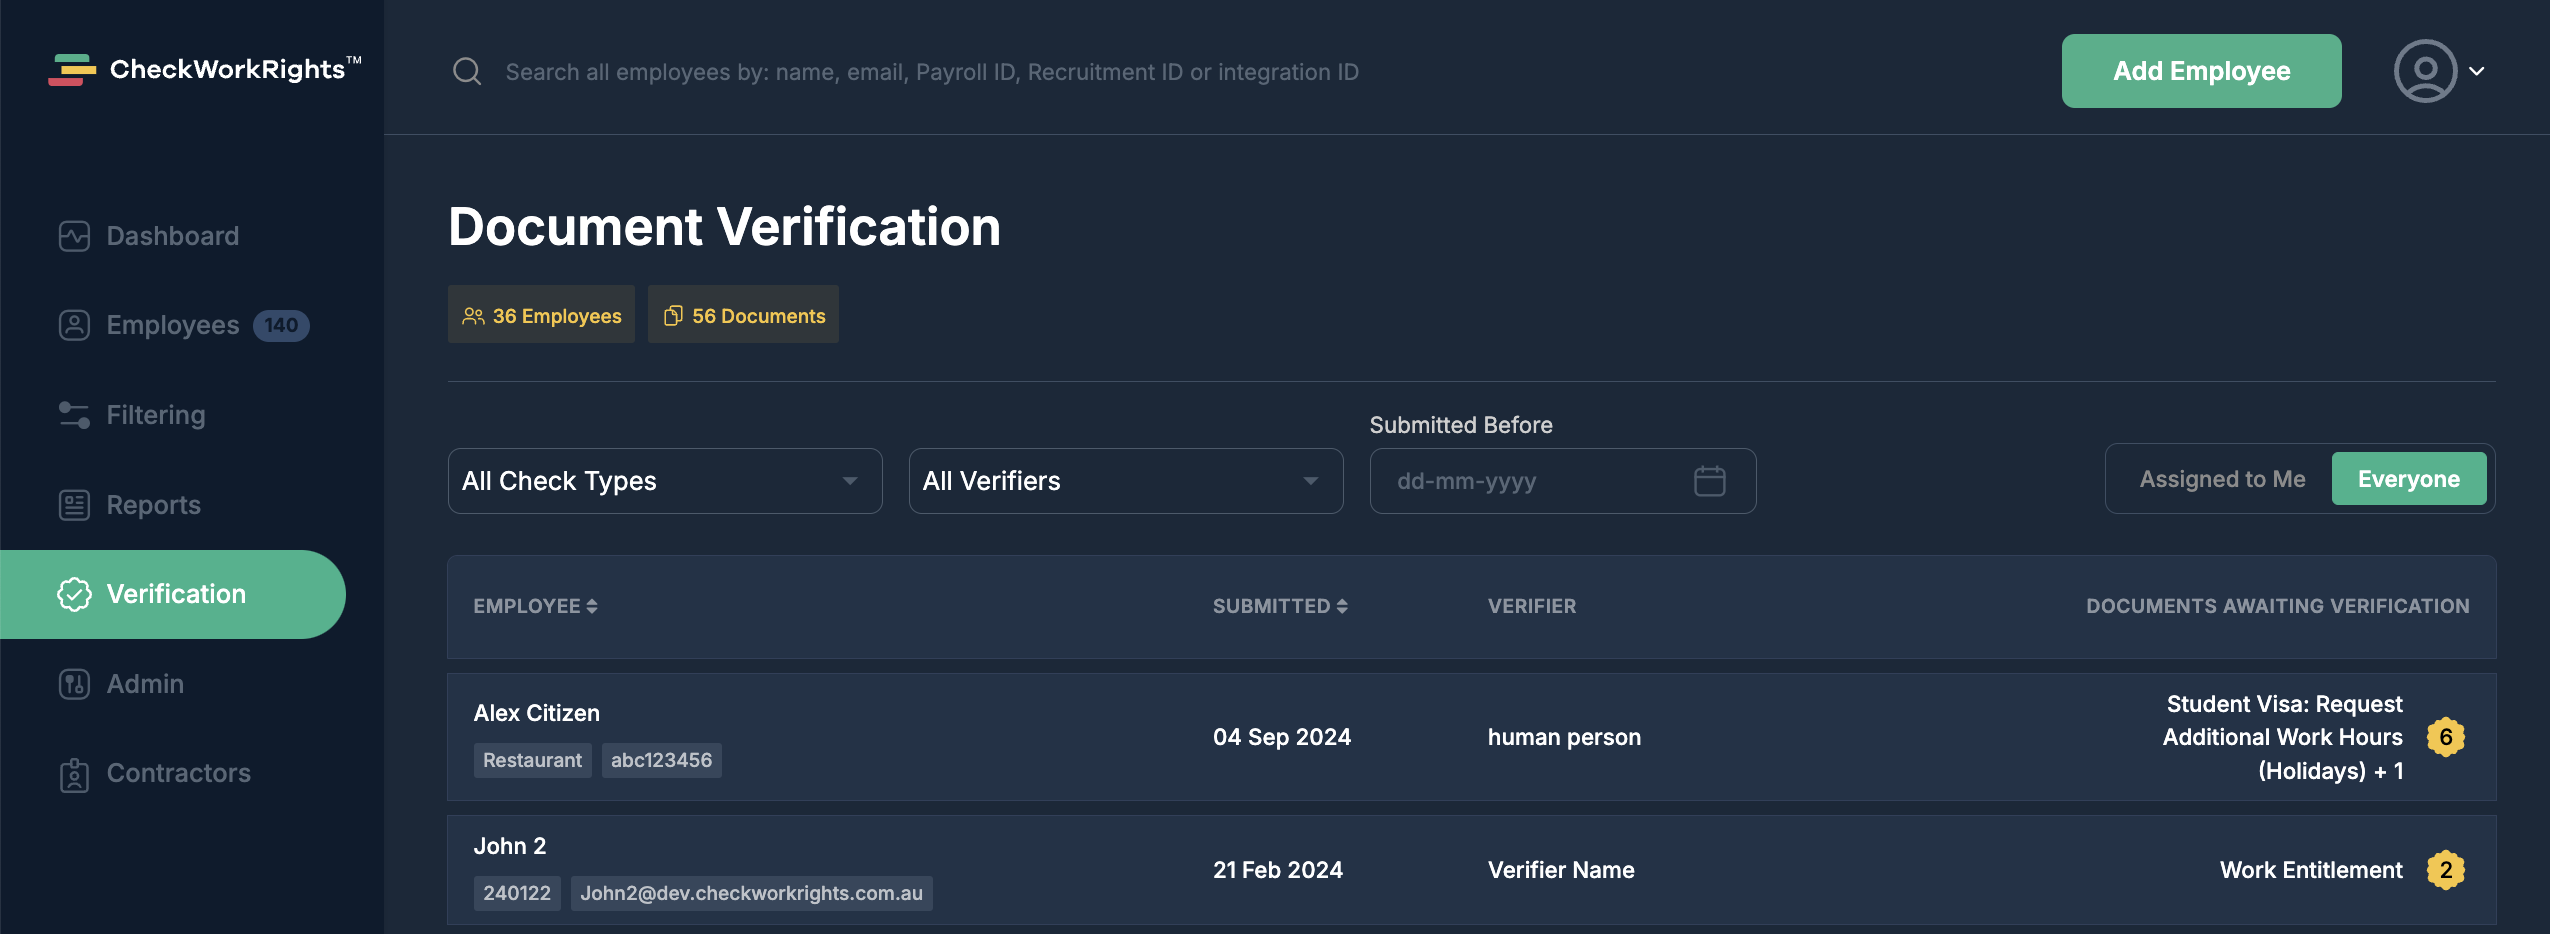
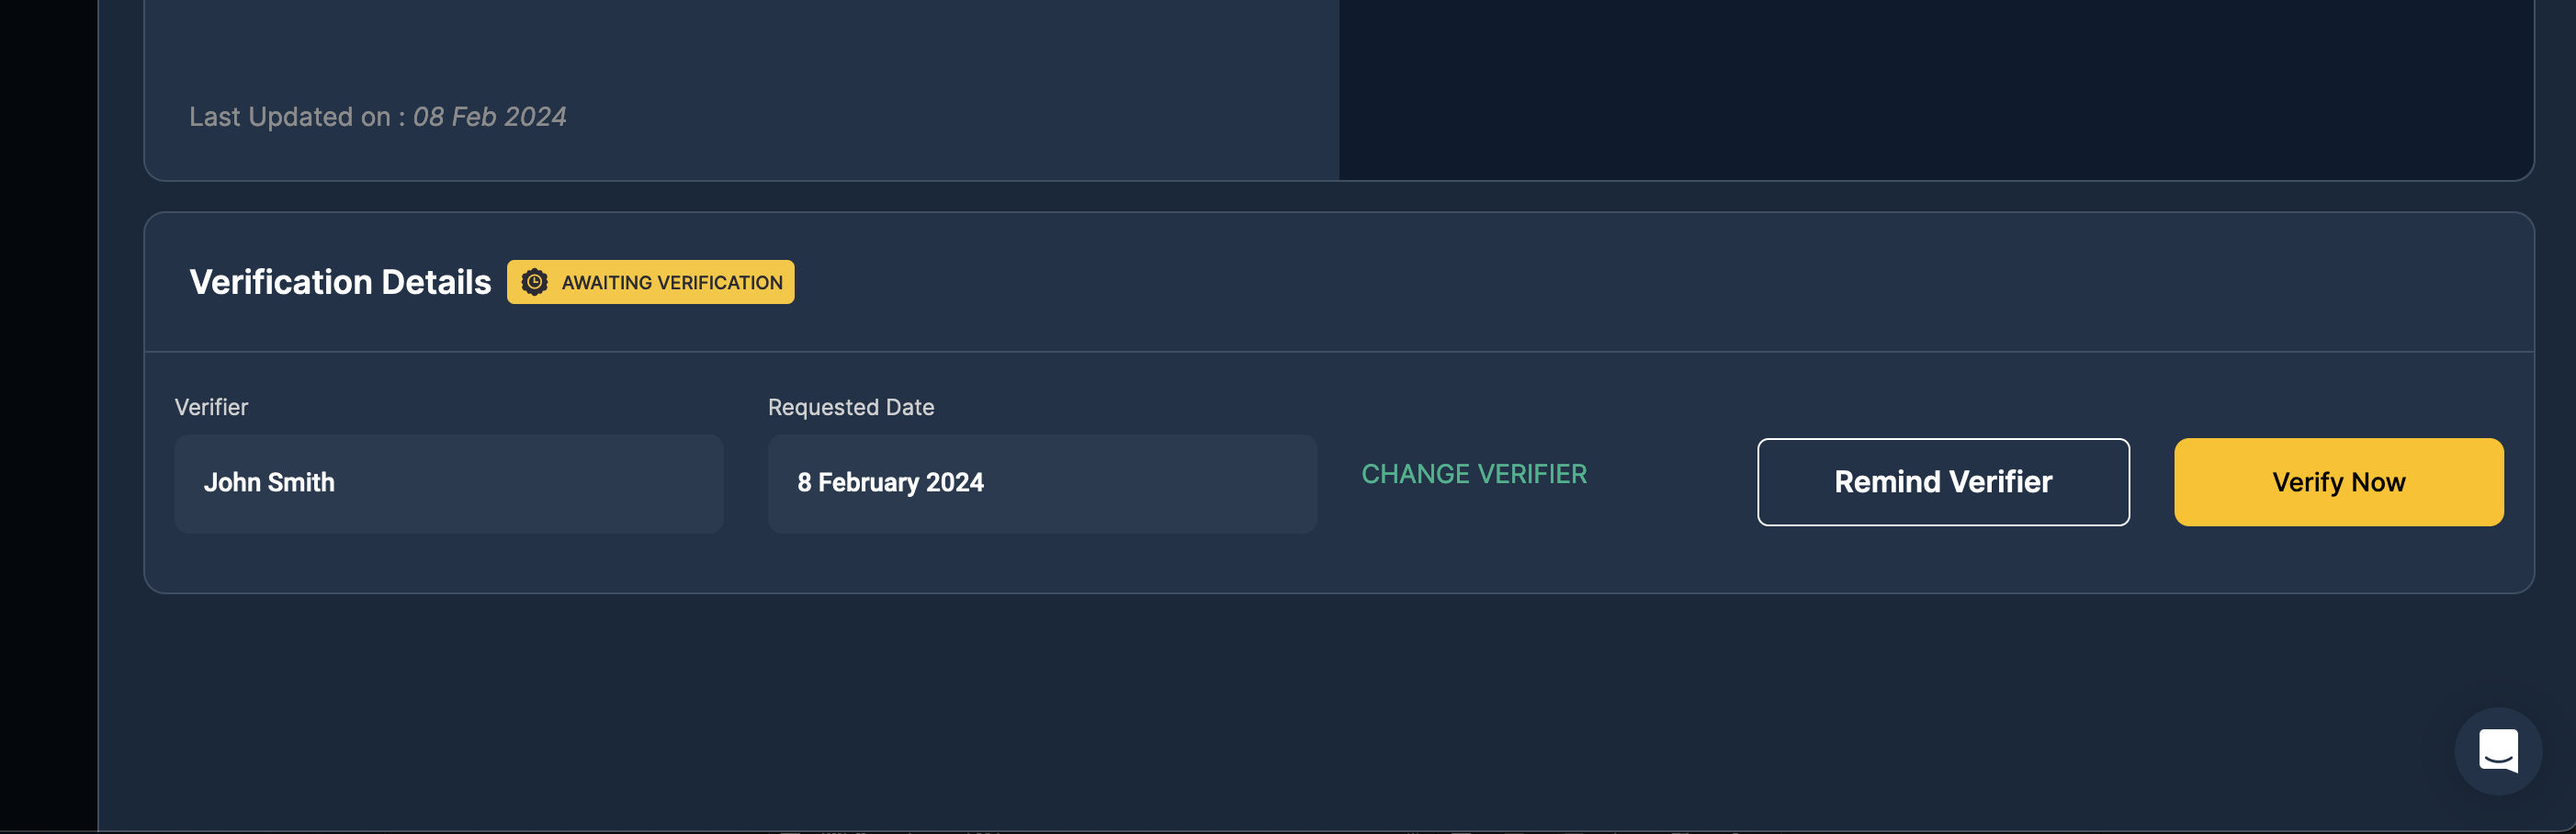
Click into any of the document awaiting verification to open the verification window and view the document.
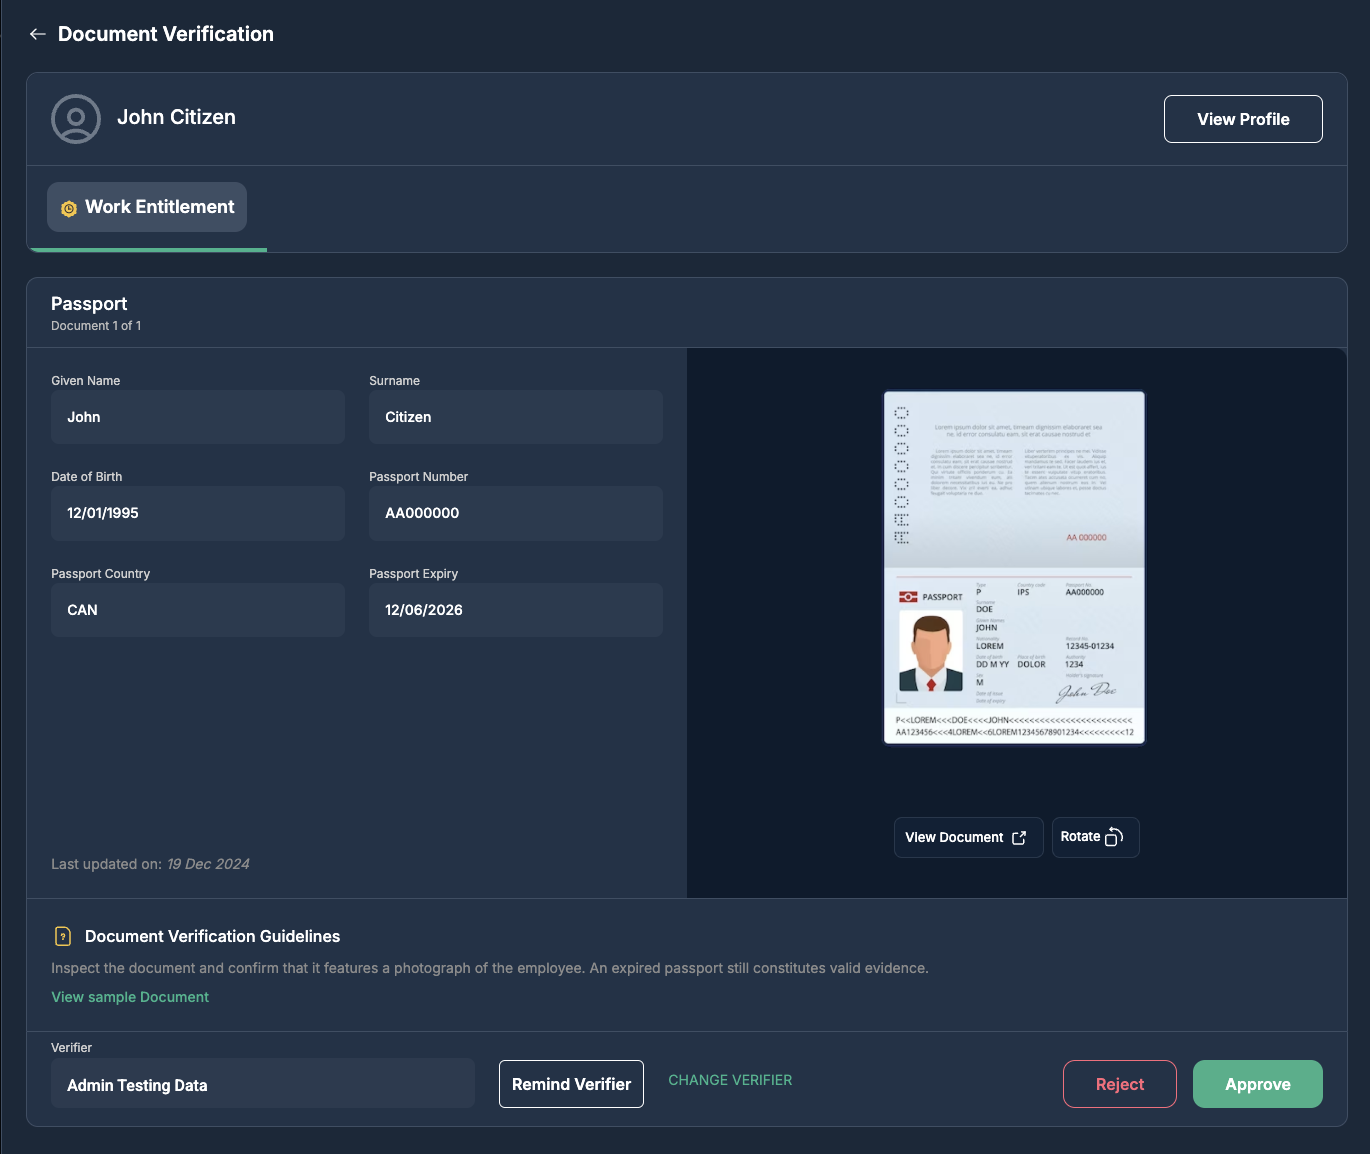
Here, the Verifier can check that the details match the document submitted, and that the image in the document matches the person who submitted it. They can also view a Sample Document so you are aware of the correct documentary evidence for the check you're verifying.
This is different for every document submission, so best practice is to confirm all required information on the document prior to verifying the evidence.
From here, the Verifier has two options, Approve or Reject the submission:
-
If the document looks acceptable, Approving it will complete the workflow.
-
If a document is Rejected, the verifier will need to provide a reason why.
What happens after a document is rejected?
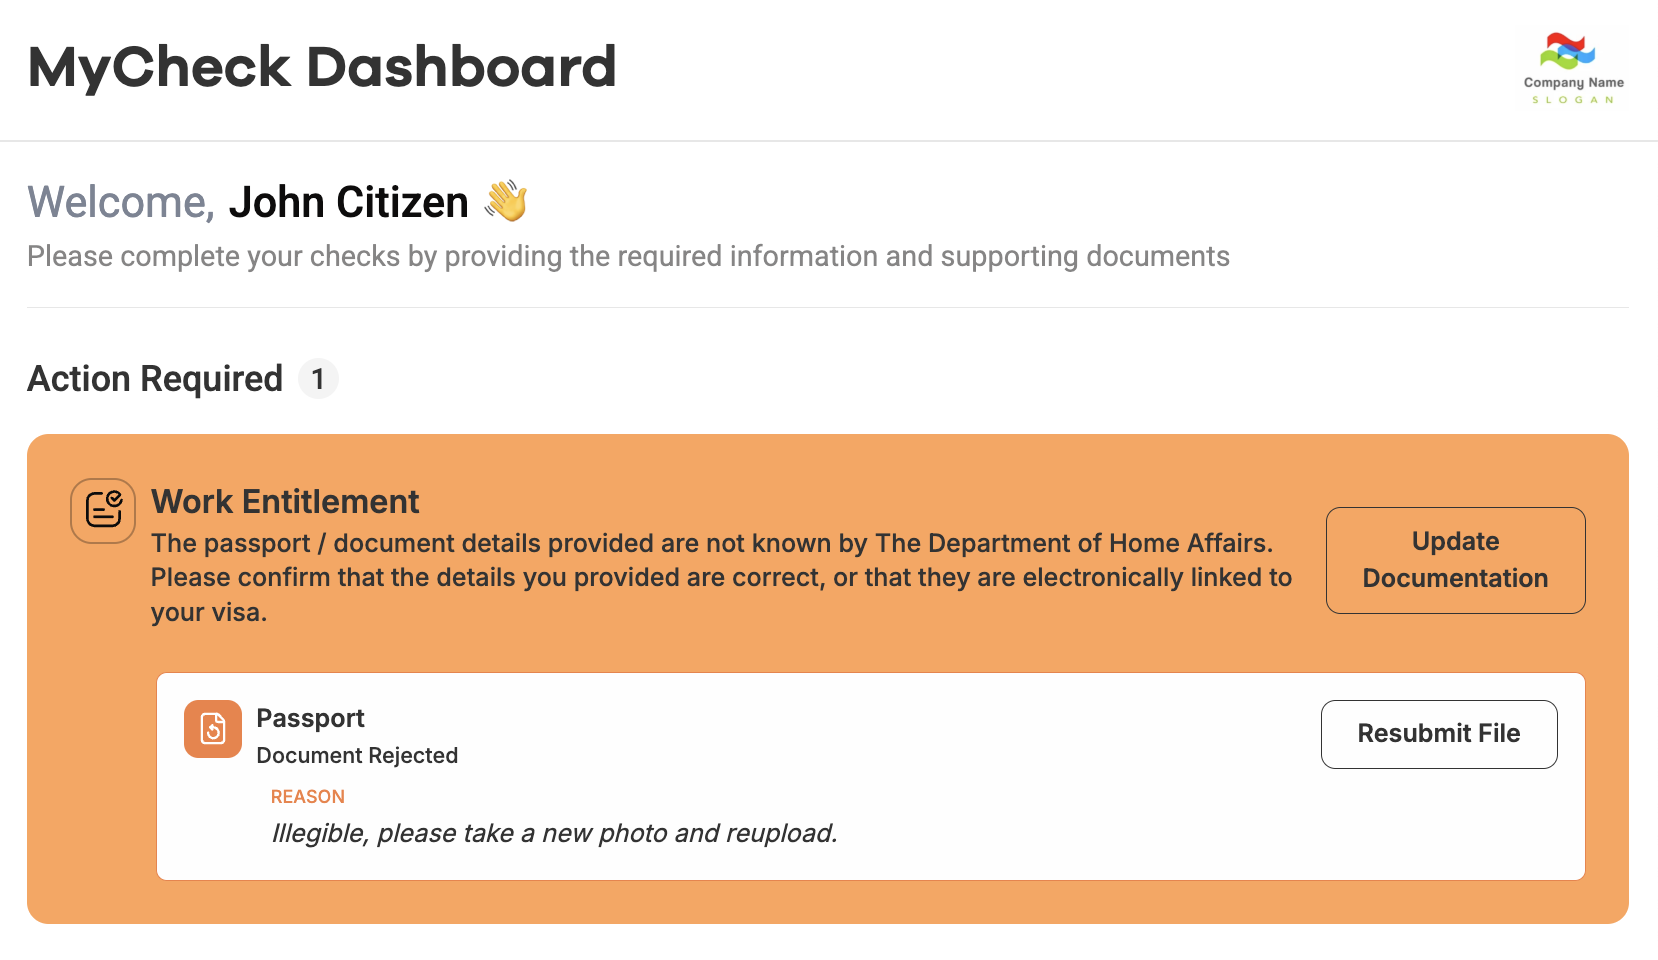
CheckWorkRights will request that the employee resubmits their documentation in the case that the evidence provided is not legible or is missing details.
Rejecting the document will automatically trigger an email send to the employee detailing the nature of the error and asking them to resubmit.
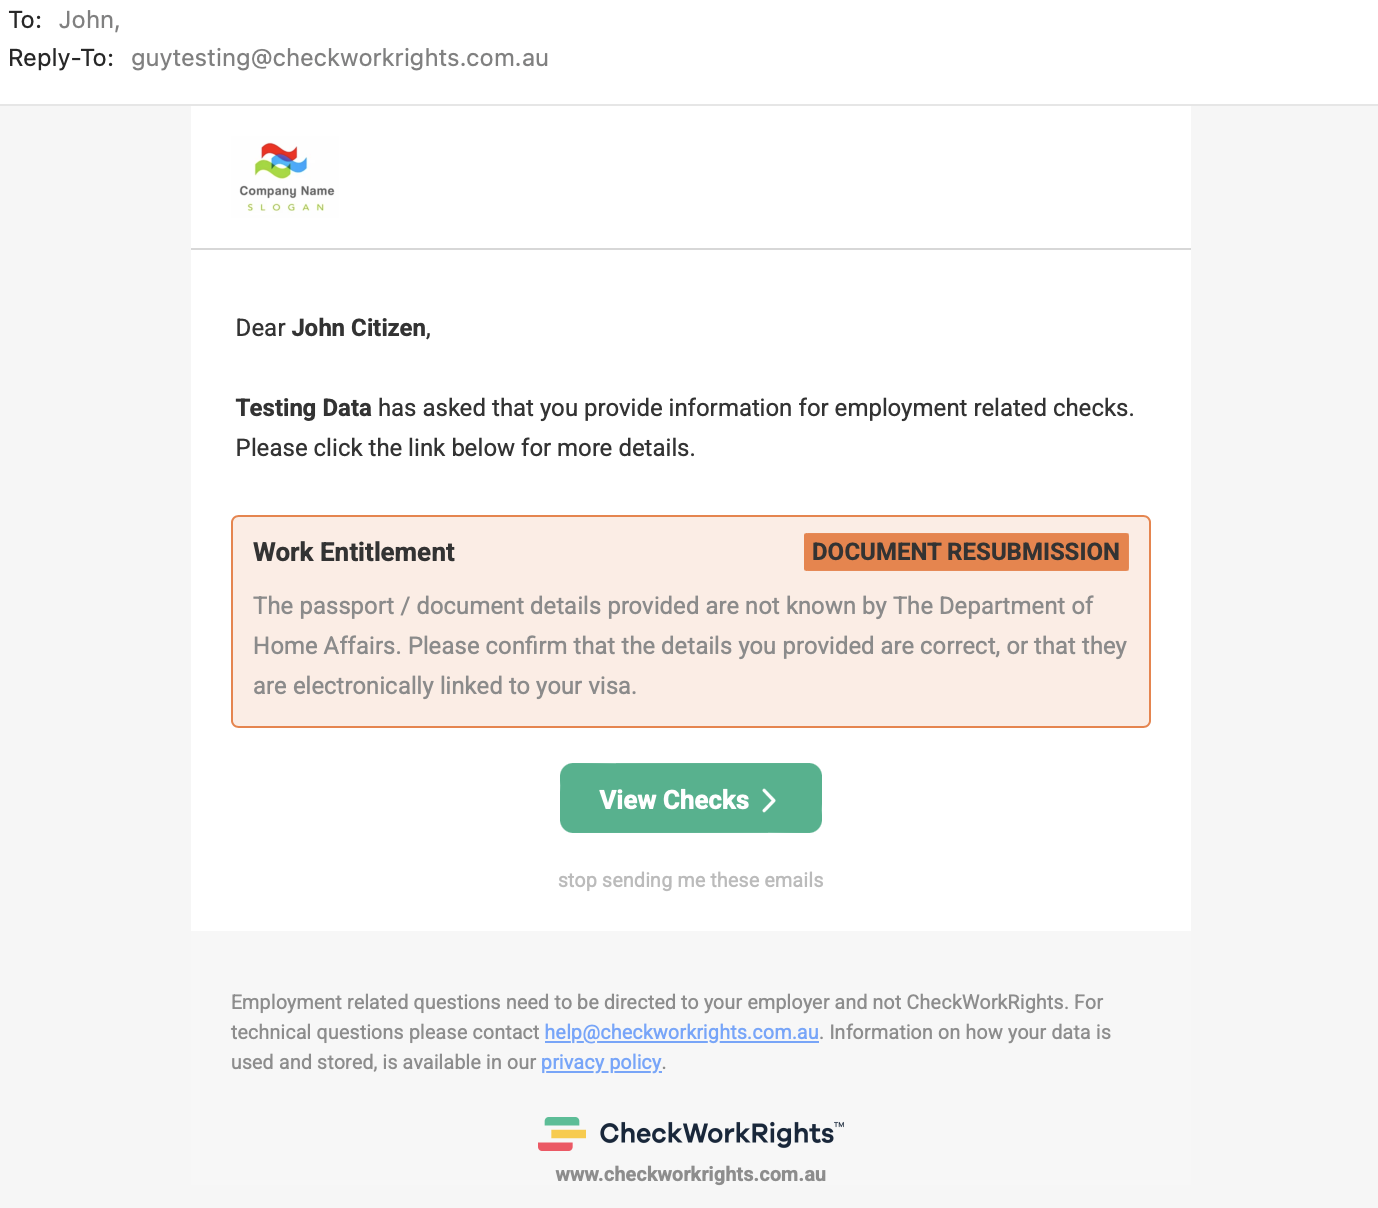
From there, the employee can access their MyCheck dashboard again to resolve the issue.
Where can I verify a Document?
You can verify documents in many places within CheckWorkRights; Document Verification via the desktop Dashboard, in the Documents tab on an employee profile, or a pop-up window will appear on an employees check in the mobile app. You will also be notified via email of any outstanding documents requiring verification.
You can also resign the verifier for a document awaiting verification in the documents tab of the employee profile by selecting 'Change Verifier'.
Mobile: Verifying Documents
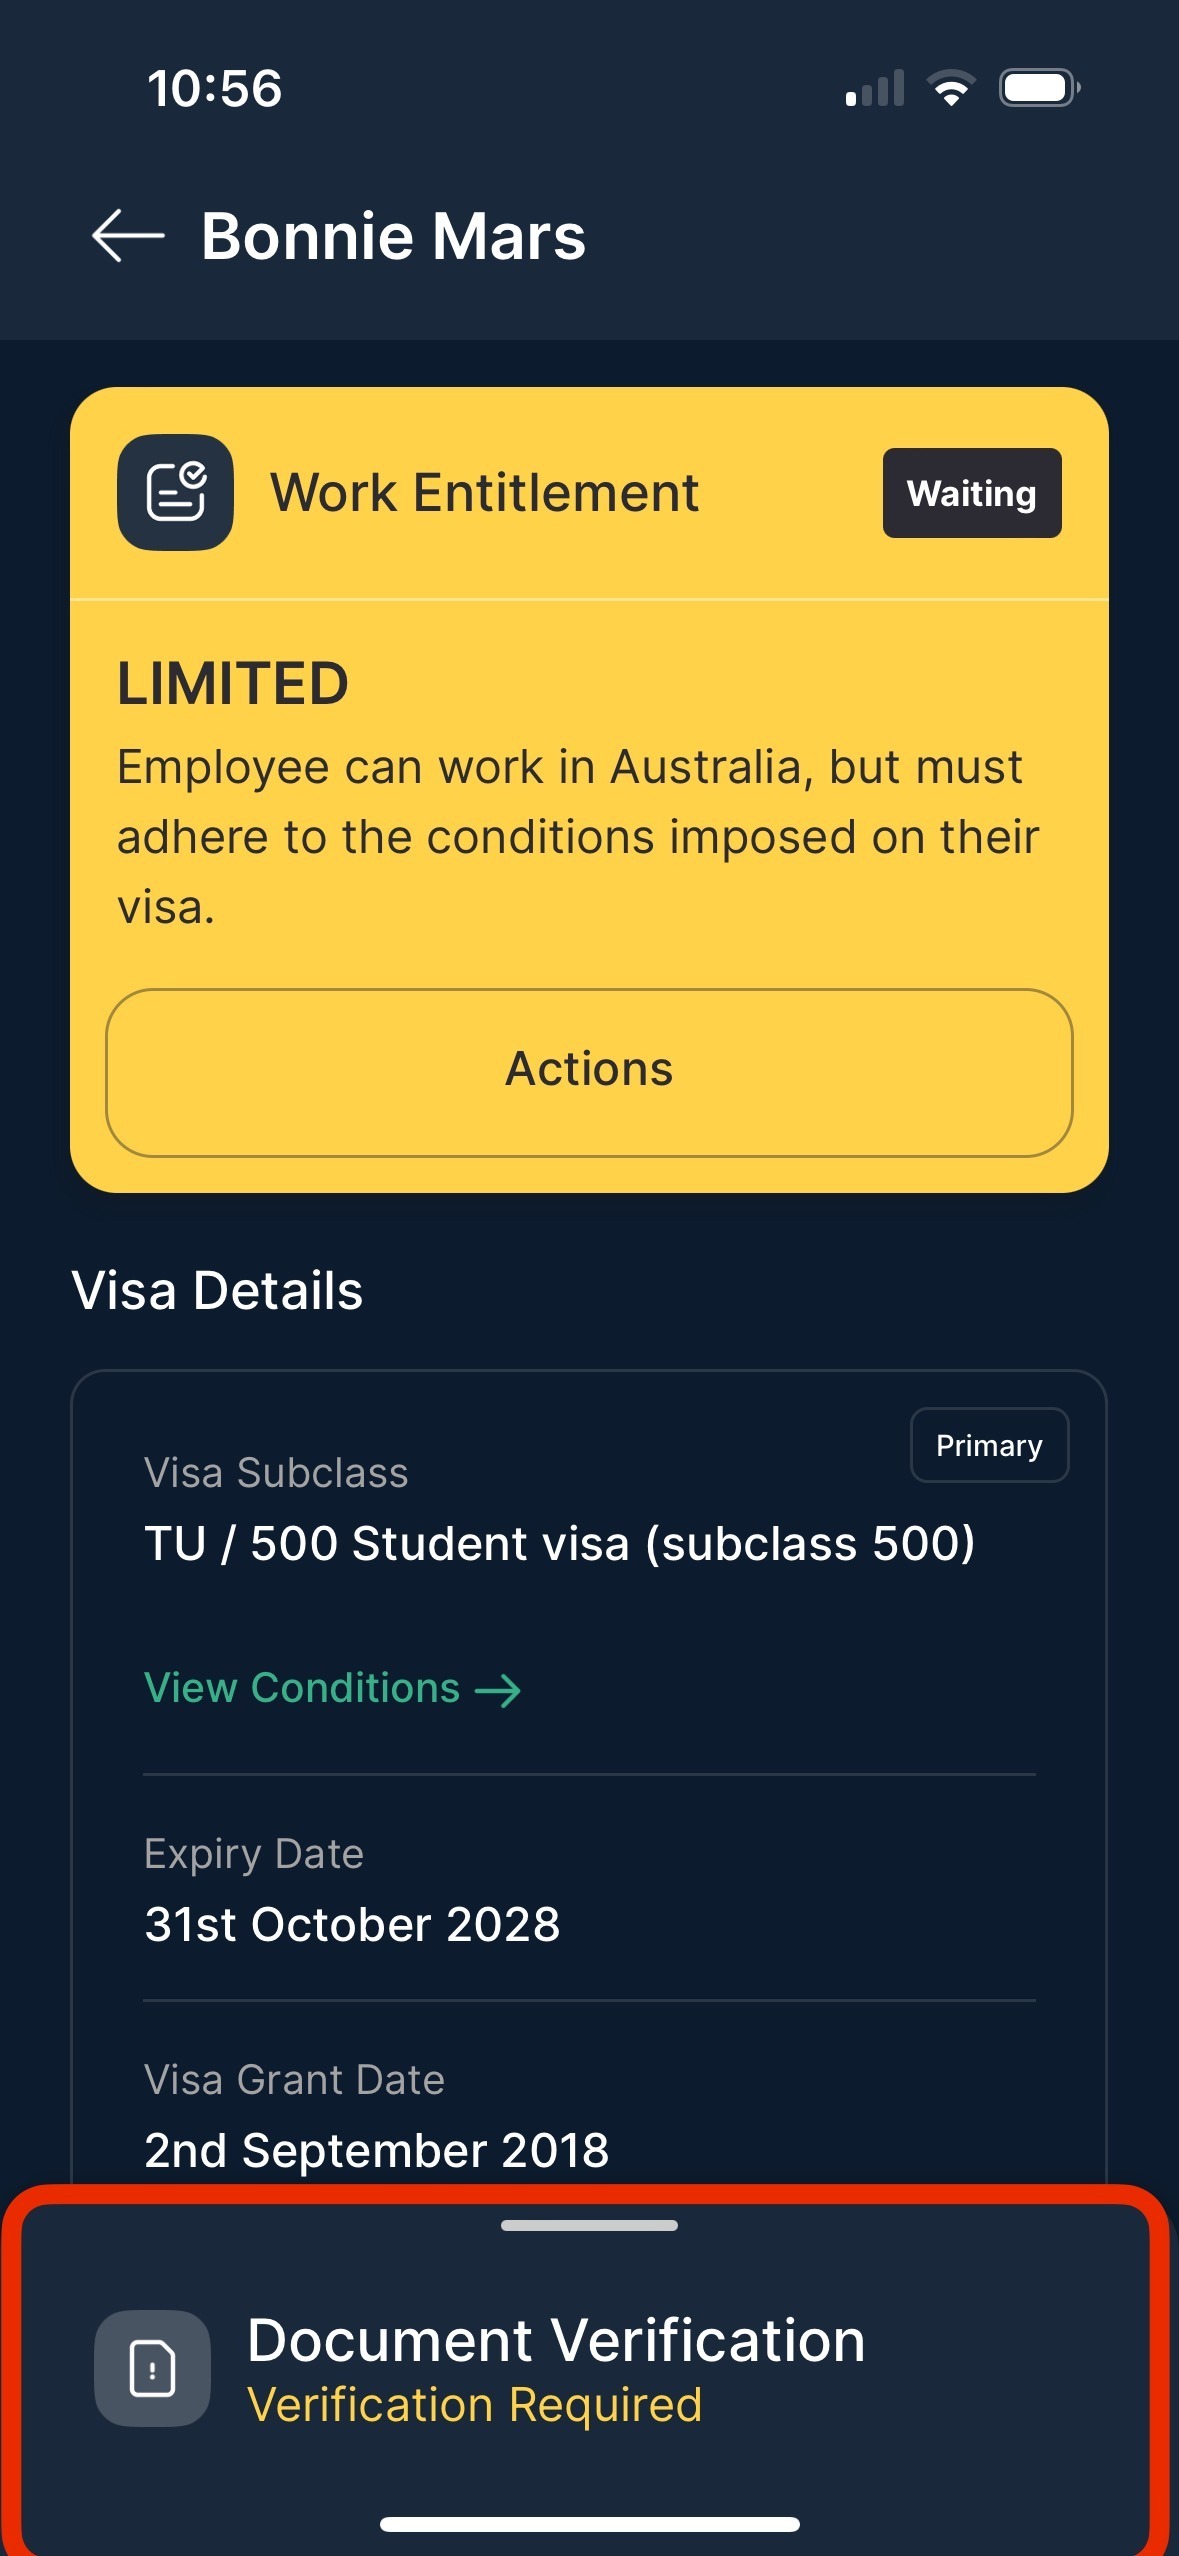
In the mobile app, you can now verify documents on employees profiles.
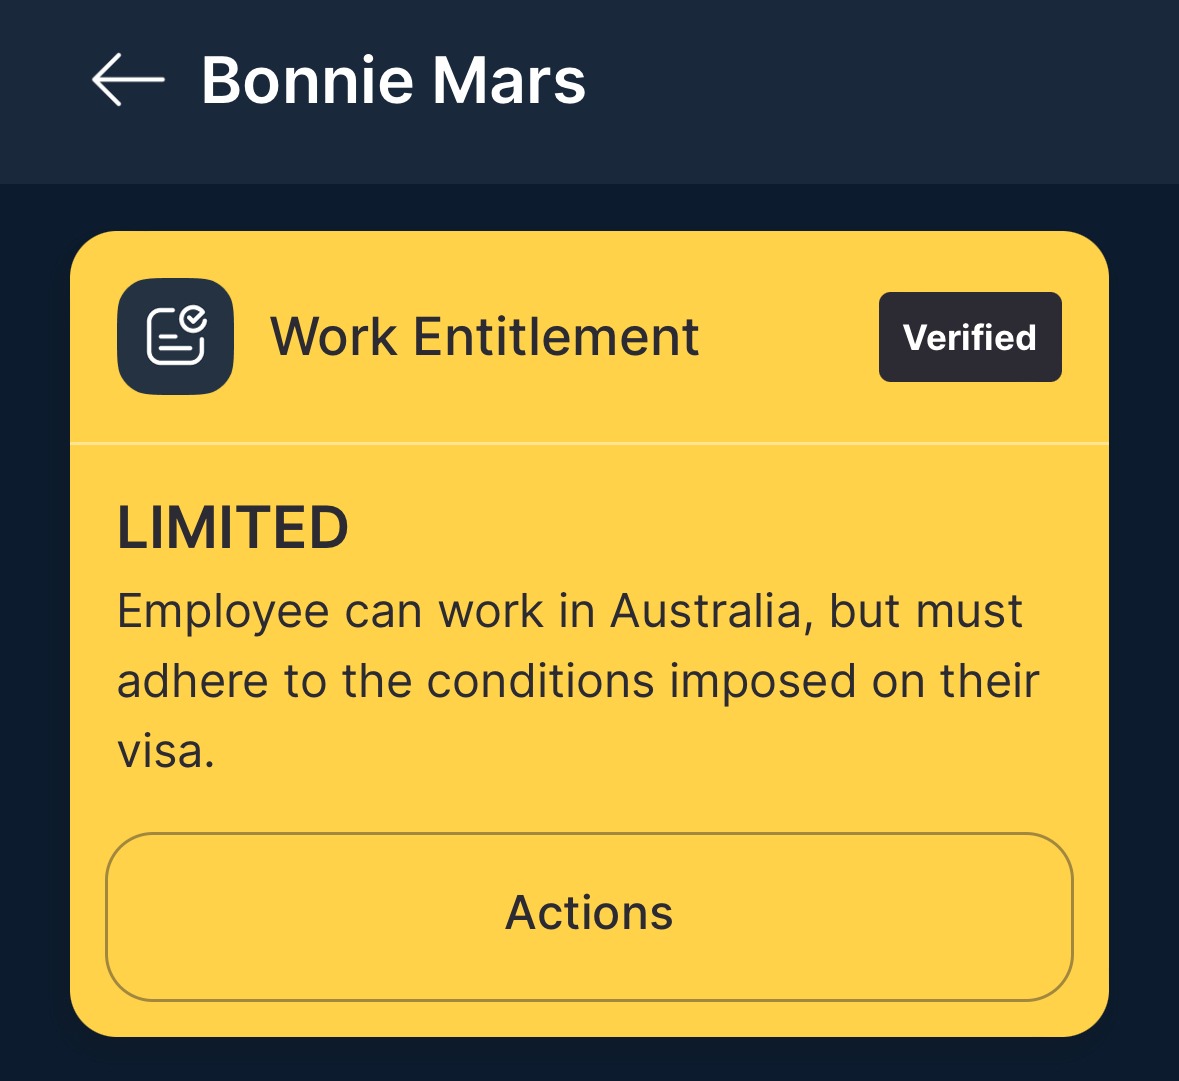
Head to the employees profile, and locate the check you are wanting to verify. Once you open the check, you'll see the label Waiting on the top right of the tile, and be shown a small pop-up at the bottom of the screen labelled Verification Required.
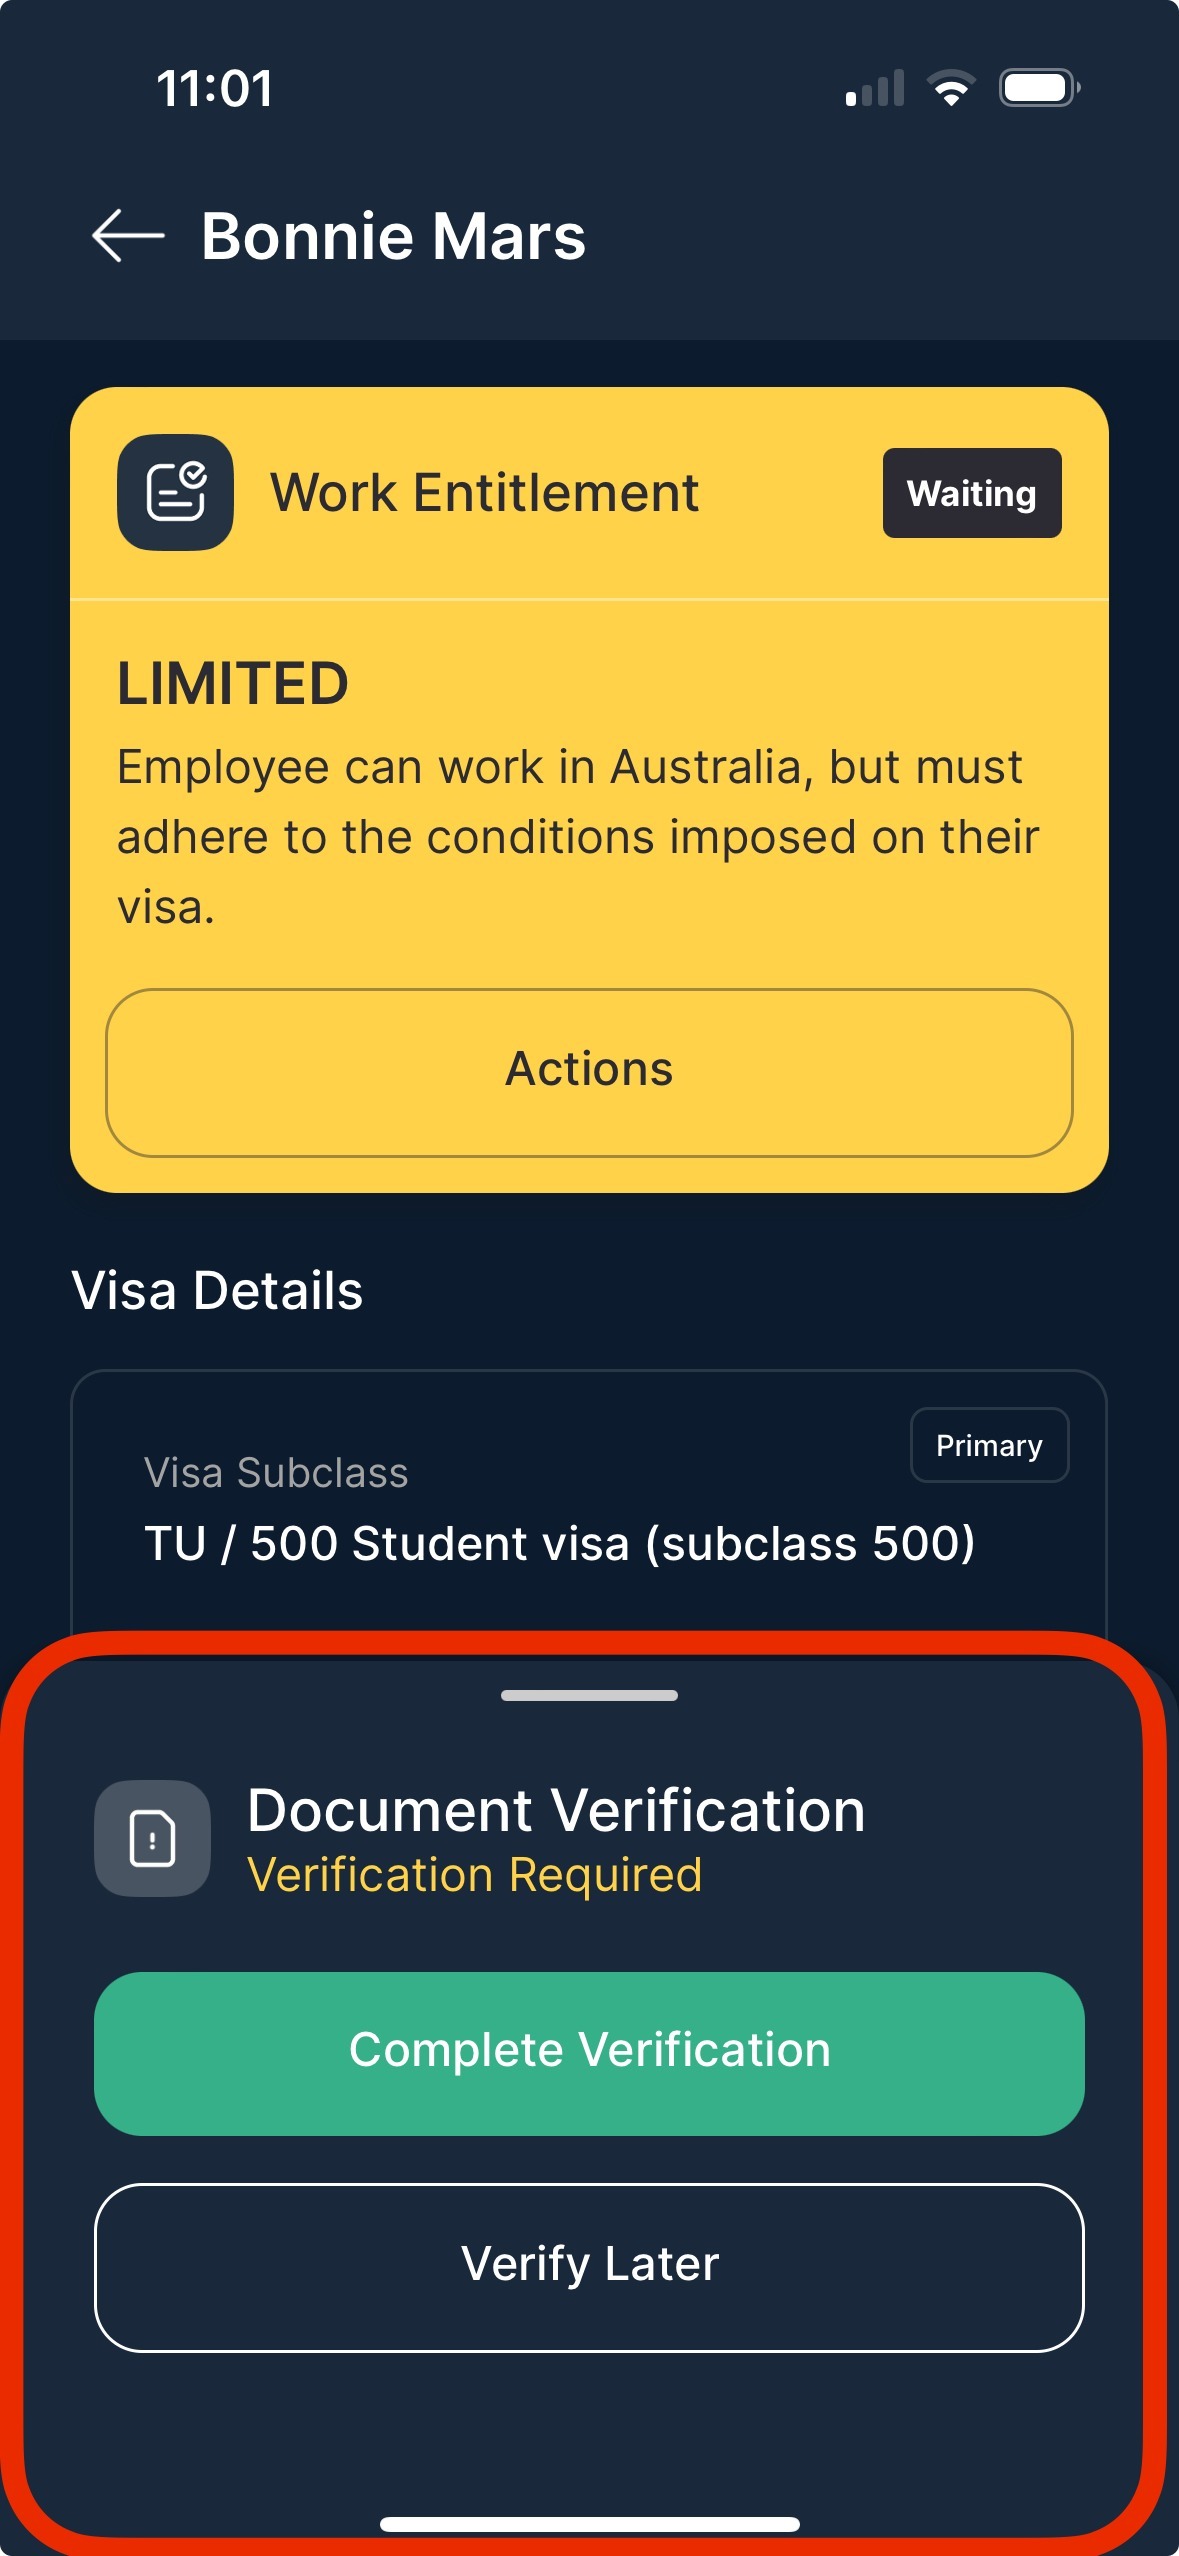
Swipe up on the pop-up and two options will appear: Complete Verification or Verify Later. Select Complete Verification.
From here, you'll see a list of available options in order to correctly verify the document: Verification Guidelines, Change Verifier, Decline or Approve. Any of these options will show a smaller pop-up. Once you have approved the document, you'll be able to see the label on the check tile change to Verified.